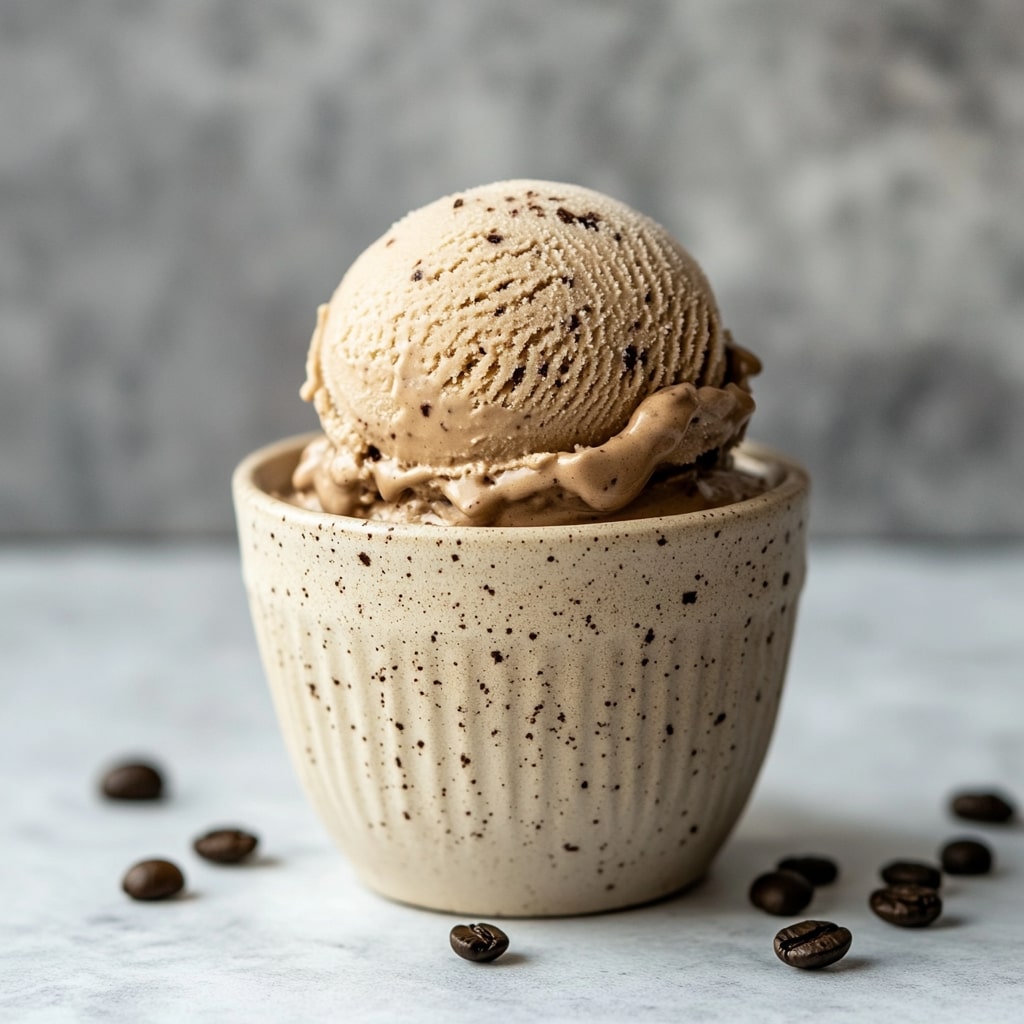
There’s something undeniably magical about homemade Creami Coffee Ice Cream. The way it blends nostalgia, creativity, and comfort into every spoonful is unmatched. Now, imagine combining that magic with the rich, bold flavor of coffee.
If you’re a coffee lover like me, this recipe will quickly become your new obsession. Whether you’re looking for a luxurious dessert or a cool afternoon pick-me-up, this recipe delivers on all fronts. Trust me, once you make it, you’ll never want to buy store-bought coffee ice cream again!
For as long as I can remember, coffee has been my go-to drink. From that first, sleepy-eyed sip in the morning to the occasional afternoon boost, it’s a flavor I cherish. But coffee isn’t just for drinking; it’s a flavor that translates beautifully into desserts, especially ice cream. I still remember the first time I tasted coffee ice cream as a kid. I was instantly hooked—the smooth, creamy texture combined with the subtle bitterness of coffee was like nothing I’d ever experienced before.
Years later, as an adult, I found myself experimenting in the kitchen, searching for the perfect homemade coffee ice cream recipe. After countless trials (and many delicious errors), I finally perfected it.
The result? A creamy, dreamy coffee ice cream that’s perfectly balanced in flavor and texture. It’s rich, indulgent, and has just the right amount of coffee kick to satisfy any caffeine craving. If you’re someone who can’t start their day without a cup of coffee or simply loves a good dessert, this recipe is for you!
Why This Creami Coffee Ice Cream Recipe
Why should you try this Creami Coffee Ice Cream recipe? Well, there are countless reasons, but let’s start with the most important one: flavor. This recipe brings together the robust taste of coffee with the silky smoothness of homemade ice cream. The result is a dessert that’s as satisfying as it is unique. It’s not just about the coffee flavor, though—that’s only half of what makes this ice cream so special.
The texture is another standout feature. Thanks to the use of high-quality ingredients and a precise method, this ice cream is incredibly creamy and smooth. There’s no need to worry about icy chunks or graininess here. Every bite melts beautifully in your mouth, leaving behind a lingering coffee flavor that’s simply irresistible.
But perhaps what I love most about this recipe is how customizable it is. Whether you prefer a strong espresso flavor or something a bit milder, you can easily adjust the coffee intensity to suit your taste. Plus, with a few tweaks, you can adapt this recipe to fit various dietary preferences, from vegan to low-sugar.
Lastly, there’s something truly special about making ice cream from scratch. It’s a labor of love that pays off in every spoonful. You get to control the ingredients, experiment with flavors, and create something that’s 100% your own. And, of course, the satisfaction of sharing a homemade treat with friends and family is unbeatable. So, why not give it a try? You’re going to love how easy and rewarding it is to make this Creami Coffee Ice Cream!
Key Ingredients to create Creami Coffee Ice Cream Recipe

Let’s talk about the key ingredients that make this Creami Coffee Ice Cream so delectable. Each component plays a crucial role in creating that perfect blend of flavor and texture. Here’s what you’ll need:
1. Coffee
The star of the show! The type of coffee you use will greatly influence the final flavor of your ice cream. For a bold, rich taste, go for a strong brewed espresso or a dark roast coffee. If you prefer something milder, a medium roast or even a flavored coffee can work beautifully. Just be sure to use freshly brewed coffee—instant coffee or stale grounds won’t deliver the same depth of flavor.
Pro Tip: If you want an even more intense coffee flavor, try adding a tablespoon of instant espresso powder to the mix. It dissolves easily and boosts the coffee taste without adding any extra liquid.
2. Heavy Cream
Heavy cream is the backbone of this ice cream, providing that luxurious, creamy texture we all crave. It’s essential for achieving a smooth, rich consistency. Make sure to use full-fat heavy cream for the best results. Lower-fat alternatives might result in a less creamy and more icy texture, which we definitely don’t want.
3. Whole Milk
Whole milk helps to balance the richness of the heavy cream, creating a perfect harmony of creaminess. Using whole milk, rather than skim or low-fat milk, ensures that your ice cream has a rich and satisfying mouthfeel without being overly dense.
4. Sugar
Sugar is vital not just for sweetness but also for texture. It lowers the freezing point of the ice cream, preventing it from becoming too hard in the freezer. Granulated white sugar works perfectly here, but if you’re looking for a slightly different flavor profile, you can experiment with brown sugar or even honey.
Substitution Idea: If you’re trying to cut down on sugar, you can use a natural sweetener like maple syrup or agave nectar. Just keep in mind that these will alter the flavor slightly and may require some adjustments in quantity.
5. Egg Yolks
Egg yolks are the secret to that velvety smooth texture. They act as a natural emulsifier, preventing the ice cream from becoming icy and ensuring a rich, creamy consistency. The egg yolks also add a subtle custard-like flavor that complements the coffee beautifully.
6. Vanilla Extract
A splash of vanilla extract enhances the overall flavor, adding warmth and depth to the ice cream. It also rounds out the coffee notes, making the final product even more irresistible.
7. Salt
Just a pinch of salt might seem like an odd addition, but it’s essential for balancing the sweetness and enhancing the coffee flavor. It brings all the ingredients together and elevates the overall taste.
Now that you know what you need, it’s time to dive into the fun part—making the ice cream!
Step-by-Step Instructions: Crafting Your Creami Coffee Ice Cream
Making homemade ice cream might seem intimidating at first, but don’t worry—I’m here to guide you through each step. By the end of this, you’ll be a coffee ice cream pro!
Step 1: Gather Your Ingredients and Equipment
Before you start, make sure you have all your ingredients measured and ready to go. You’ll also need an ice cream maker, a medium saucepan, a whisk, a mixing bowl, and a fine-mesh sieve. Having everything prepared beforehand makes the process much smoother.
Step 2: Brew the Coffee
Start by brewing a fresh pot of coffee. You’ll need about 1 cup of strong brewed coffee for this recipe. Once it’s ready, set it aside to cool slightly.
Step 3: Prepare the Custard Base
In a medium saucepan, combine the heavy cream, whole milk, and half of the sugar. Place the saucepan over medium heat and cook the mixture, stirring occasionally, until it’s just about to simmer. You don’t want it to boil, so keep a close eye on it.
While the cream mixture is heating, whisk the egg yolks and the remaining sugar together in a separate mixing bowl until the mixture is pale and slightly thickened. This will take about 2-3 minutes of whisking.
Step 4: Temper the Eggs
Here’s where we get a little technical, but don’t worry—it’s easier than it sounds! To prevent the egg yolks from curdling, you’ll need to temper them. Slowly pour about 1/2 cup of the hot cream mixture into the egg yolk mixture, whisking constantly as you pour. This gradual heating prevents the eggs from scrambling.
Once the eggs are tempered, pour the egg mixture back into the saucepan with the rest of the cream mixture. Continue to cook over medium heat, stirring constantly with a wooden spoon or spatula. Cook until the custard thickens slightly and coats the back of the spoon, which should take about 5-7 minutes.
Step 5: Infuse the Coffee Flavor
Remove the custard from the heat and stir in the brewed coffee, vanilla extract, and a pinch of salt. Mix until everything is well combined. If you want a stronger coffee flavor, this is the perfect time to add that extra tablespoon of instant espresso powder.
Step 6: Strain and Chill the Custard
To ensure a silky-smooth ice cream, pour the custard through a fine-mesh sieve into a clean bowl. This step removes any potential bits of cooked egg, leaving you with a perfectly smooth base. Cover the bowl with plastic wrap, pressing the wrap directly onto the surface of the custard to prevent a skin from forming. Chill the mixture in the refrigerator for at least 4 hours, or preferably overnight.
Step 7: Churn the Ice Cream
Once the custard is fully chilled, it’s time to churn! Pour the mixture into your ice cream maker and churn according to the manufacturer’s instructions. This usually takes about 20-25 minutes, depending on your machine. The ice cream should be thick and creamy but still soft enough to scoop easily.
Step 8: Freeze and Serve
Transfer the churned ice cream to an airtight container and freeze
for at least 2 hours to allow it to firm up. When you’re ready to serve, let the ice cream sit at room temperature for a few minutes to soften slightly before scooping. Now, grab a spoon, dig in, and enjoy the fruits of your labor!
Presentation Suggestions for Creami Coffee Ice Cream

Presentation is key, especially when serving something as delightful as Creami Coffee Ice Cream. Here are some tips and ideas to make your dessert look as amazing as it tastes:
Plating Techniques
When it comes to serving ice cream, the little details can make a big difference. Use a warm ice cream scoop to create perfectly round, smooth scoops. For an elegant touch, serve the ice cream in chilled bowls or fancy dessert glasses. You can even sprinkle some finely ground coffee or cocoa powder on top for a sophisticated finish.
Garnishes That Shine
Garnishing your Creami Coffee Ice Cream adds flavor and visual appeal. Try topping your scoops with shaved dark chocolate, chocolate-covered espresso beans, or a drizzle of caramel sauce. For a crunchy contrast, add some chopped nuts, like almonds or hazelnuts. Whipped cream is always a welcome addition, especially if it’s lightly sweetened with a hint of vanilla.
Pairing Ideas
This coffee ice cream pairs beautifully with a variety of desserts. Serve it alongside a slice of rich chocolate cake, a warm brownie, or even a slice of buttery pound cake. For a fun twist, use it to make ice cream sandwiches with chocolate chip cookies. If you’re feeling extra indulgent, try making an affogato by pouring a shot of hot espresso over a scoop of the ice cream—it’s a coffee lover’s dream!
Try our Orange Pineapple Ice Cream Recipe for another tasty experience. It’s just as satisfying and easy to prepare.
Variations and Dietary Adaptations:
One of the great things about this Creami Coffee Ice Cream recipe is how versatile it is. Whether you want to experiment with flavors or need to adapt the recipe for dietary reasons, there are plenty of ways to make it your own.
Flavor Variations
- Mocha Madness: Add 2 tablespoons of unsweetened cocoa powder to the custard mixture for a rich mocha flavor. You can also toss in some mini chocolate chips during the last few minutes of churning for an extra treat.
- Cinnamon Swirl: Stir in 1 teaspoon of ground cinnamon and a pinch of nutmeg to the custard for a warm, spiced twist. This variation is perfect for the colder months when you’re craving something cozy.
- Vanilla Latte: Increase the vanilla extract to 2 teaspoons and use a milder coffee for a flavor that mimics a creamy vanilla latte. You can also add a swirl of caramel sauce before freezing for a caramel latte effect.
Dietary Adaptations
- Vegan Version: To make this ice cream vegan, substitute the heavy cream with full-fat coconut milk and the whole milk with almond or oat milk. Replace the egg yolks with a cornstarch slurry (2 tablespoons of cornstarch mixed with 2 tablespoons of water) to achieve a creamy texture. Use a plant-based sweetener like agave or maple syrup if desired.
- Dairy-Free: For a dairy-free option, follow the same substitutions as the vegan version, or use a high-quality dairy-free creamer in place of the heavy cream. Make sure the creamer you choose is rich and thick to maintain that creamy texture.
- Low-Sugar Option: Substitute the granulated sugar with a natural sweetener like stevia, monk fruit, or erythritol. Keep in mind that you might need to adjust the quantity, as these sweeteners can be more or less potent than sugar.
Personal Touches
Don’t be afraid to get creative! You can mix in different ingredients like chocolate chunks, nuts, or even a swirl of your favorite jam. Have you ever tried adding a splash of your favorite liqueur, like Baileys or Kahlúa? These can add a whole new dimension of flavor to your ice cream.
FAQs About Creami Coffee Ice Cream Recipe
Q: Can I use decaf coffee in this recipe?
A: Absolutely! If you’re sensitive to caffeine or want to enjoy this ice cream in the evening, decaf coffee works perfectly. You’ll still get all the delicious coffee flavor without the caffeine buzz.
Q: How long does this ice cream last in the freezer?
A: Homemade ice cream is best enjoyed within 1-2 weeks. After that, it can start to develop ice crystals and lose its creamy texture. Be sure to store it in an airtight container to keep it as fresh as possible.
Q: What if I don’t have an ice cream maker?
A: No worries! You can still make this recipe without an ice cream maker. After chilling the custard, pour it into a shallow dish and place it in the freezer. Stir the mixture every 30 minutes to break up any ice crystals until it’s fully frozen.
Q: Can I add mix-ins to this ice cream?
A: Definitely! Feel free to add mix-ins like chocolate chips, nuts, or cookie crumbles. Just stir them in during the last few minutes of churning so they’re evenly distributed.
Q: Is it okay to double the recipe?
A: Yes, you can double the recipe if you’re serving a crowd. Just make sure your ice cream maker has enough capacity to handle the larger quantity. If not, you can always churn the mixture in batches.
Q: Can I make this ice cream ahead of time?
A: Yes, this ice cream can be made ahead of time and stored in the freezer. Just remember to let it soften for a few minutes at room temperature before serving for the best texture.
Conclusion: Why You’ll Love Making Creami Coffee Ice Cream
In a world filled with endless dessert options, there’s something truly special about homemade ice cream. This Creami Coffee Ice Cream recipe is a delightful blend of bold coffee flavor and creamy indulgence that’s hard to resist. Whether you’re a seasoned home cook or just starting, this recipe is accessible, fun, and endlessly customizable.
What makes this ice cream even better is the personal touch you bring to it. From choosing the perfect coffee to adding your favorite mix-ins, every step allows you to create something uniquely yours. Plus, the joy of sharing a homemade treat with loved ones is incomparable.
So, are you ready to give it a try? I’m confident that once you do, this Creami Coffee Ice Cream will become a staple in your dessert repertoire. Don’t forget to share your creations and let me know how it turns out. Happy churning!
